
When building microservices, resilience is critical. Spring Boot and Resilience4j provide robust tools for implementing fault tolerance, which prevents cascading failures and enhances application stability. A circuit breaker is a resilience mechanism that controls service interactions to reduce latency issues and gracefully handle failures. This guide will walk you through setting up and configuring the Resilience4j Circuit Breaker in a Spring Boot application.

What is Resilience4j?
Resilience4j is a lightweight, easy-to-use library specifically designed for Java, offering various resilience patterns such as Retry, Rate Limiter, Bulkhead, TimeLimiter, and Circuit Breaker. It’s particularly well-suited for Java microservices and integrates easily with Spring Boot, allowing developers to build more fault-tolerant applications.
The Circuit Breaker pattern, available in Resilience4j, prevents an application from repeatedly calling a service that may be experiencing issues. When the service’s failure rate exceeds a specified threshold, the circuit breaker trips, blocking further service calls and allowing recovery time.
Key Concepts of the Circuit Breaker Pattern
- Closed: The circuit breaker allows requests to pass through while monitoring failures. If the failure rate exceeds the threshold, it transitions to “Open.”
- Open: Requests are no longer forwarded to the service. After a set timeout, the circuit breaker moves to “Half-Open.”
- Half-Open: A limited number of requests are allowed to pass. If they succeed, the circuit returns to “Closed.” If they fail, it goes back to “Open.”
Setting Up Resilience4j Circuit Breaker in Spring Boot

Step 1: Add Dependencies
To start using Resilience4j in a Spring Boot project, add the following dependencies in pom.xml:
<dependency>
    <groupId>io.github.resilience4j</groupId>
    <artifactId>resilience4j-spring-boot3</artifactId>
    <version>2.2.0</version>
</dependency>
<dependency>
    <!-- needed for Resilience4j -->
    <groupId>org.springframework.boot</groupId>
    <artifactId>spring-boot-starter-aop</artifactId>
</dependency>
<dependency>
    <groupId>io.github.resilience4j</groupId>
    <artifactId>resilience4j-circuitbreaker</artifactId>
    <version>2.2.0</version>
</dependency>
Step 2: Configuration in application.yml
After adding dependencies, configure the circuit breaker settings. Here’s an example configuration:
resilience4j:
  circuitbreaker:
    instances:
      exampleService:
        registerHealthIndicator: true
        slidingWindowType: COUNT_BASED
        slidingWindowSize: 10
        permittedNumberOfCallsInHalfOpenState: 3
        waitDurationInOpenState: 5000
        failureRateThreshold: 50
        slowCallRateThreshold: 100
        minimumNumberOfCalls: 5
        slowCallDurationThreshold: 2000
Explanation of the properties:
- slidingWindowType: Defines the type of the sliding window (
COUNT_BASEDorTIME_BASED). - slidingWindowSize: Number of calls recorded in the window.
- permittedNumberOfCallsInHalfOpenState: Controls how many calls are permitted in the “Half-Open” state.
- waitDurationInOpenState: Time to wait in the “Open” state before moving to “Half-Open.”
- failureRateThreshold: Percentage of failed calls before the circuit breaker opens.
- slowCallRateThreshold: Threshold for slow calls, opening the circuit if exceeded.
- minimumNumberOfCalls: Minimum calls required before calculating the failure rate.
- slowCallDurationThreshold: Threshold to mark a call as slow.
Step 3: Implement a Circuit Breaker in a Controller
Create a controller class and apply the circuit breaker annotation to protect specific methods. In this example, the @CircuitBreaker annotation is applied to an API method.
import io.github.resilience4j.circuitbreaker.CircuitBreakerRegistry;
import io.github.resilience4j.circuitbreaker.annotation.CircuitBreaker;
import lombok.extern.slf4j.Slf4j;
import org.springframework.beans.factory.annotation.Autowired;
import org.springframework.http.HttpStatus;
import org.springframework.http.ResponseEntity;
import org.springframework.web.bind.annotation.GetMapping;
import org.springframework.web.bind.annotation.PathVariable;
import org.springframework.web.bind.annotation.RestController;

@RestController
@Slf4j
public class UserController {

    @Autowired
    private CircuitBreakerRegistry circuitBreakerRegistry;

    @CircuitBreaker(name = "userController", fallbackMethod = "fallback")
    @GetMapping("/users/{userId}")
    public ResponseEntity<String> getUserById(@PathVariable("userId") String userId) throws Exception {
        if(userId.equals("1")){
             throw new Exception("Error");
        }
        return ResponseEntity.ok("success query user by ID.");
    }

    public ResponseEntity<String> fallback(Exception ex) {
        io.github.resilience4j.circuitbreaker.CircuitBreaker circuitBreaker = circuitBreakerRegistry.circuitBreaker("userController");
        log.info("circuitBreaker state {}",String.valueOf(circuitBreaker.getState()));
        return ResponseEntity.status(HttpStatus.SERVICE_UNAVAILABLE).body("External service is currently unavailable. Please try again later. "+ circuitBreaker.getState());
    }

}
In this code:
- @CircuitBreaker: Applied to the
callExternalServicemethod with the circuit breaker instance nameexampleService. - fallbackMethod: Defines a fallback method,
fallbackwhich will be invoked if the circuit breaker is in the “Open” state or an exception is thrown. - circuitBreakerRegistry: a central place where all
CircuitBreakerinstances are managed.
Step 4: Monitor Circuit Breaker Metrics
Resilience4j provides metrics that can be exposed through Spring Boot Actuator endpoints, allowing for monitoring via dashboards. To integrate with Actuator, add the following dependency:
<dependency>
    <groupId>io.github.resilience4j</groupId>
    <artifactId>resilience4j-micrometer</artifactId>
</dependency>
<dependency>
    <groupId>org.springframework.boot</groupId>
    <artifactId>spring-boot-starter-actuator</artifactId>
</dependency>
After adding these dependencies, enable actuator metrics in application.yml:
management:
  endpoints:
    web:
      exposure:
        include: "*"
With this setup, the /actuator/circuitbreakers endpoint will display circuit breaker metrics, including the current state, failure rate, and slow call rate. You can visualize these metrics using a tool like Grafana.
{
   "circuitBreakers":{
      "userController":{
         "failureRate":"-1.0%",
         "slowCallRate":"-1.0%",
         "failureRateThreshold":"50.0%",
         "slowCallRateThreshold":"100.0%",
         "bufferedCalls":0,
         "failedCalls":0,
         "slowCalls":0,
         "slowFailedCalls":0,
         "notPermittedCalls":0,
         "state":"CLOSED"
      }
   }
}
Customizing Circuit Breaker with Programmatic Configuration
In addition to application.yml, you can configure the circuit breaker programmatically using the CircuitBreakerRegistry. This approach allows for dynamic circuit breaker configurations.
import io.github.resilience4j.circuitbreaker.CircuitBreaker;
import io.github.resilience4j.circuitbreaker.CircuitBreakerConfig;
import io.github.resilience4j.circuitbreaker.CircuitBreakerRegistry;
import org.springframework.context.annotation.Bean;
import org.springframework.context.annotation.Configuration;

import java.time.Duration;

@Configuration
public class CircuitBreakerConfigCustomizer {

    @Bean
    public CircuitBreakerRegistry customCircuitBreakerRegistry() {
        // Define custom CircuitBreaker configuration
        CircuitBreakerConfig config = CircuitBreakerConfig.custom()
                .failureRateThreshold(50) // Open circuit if 50% of requests fail
                .slidingWindowType(CircuitBreakerConfig.SlidingWindowType.COUNT_BASED) // Count-based sliding window
                .slidingWindowSize(10) // Last 10 requests
                .minimumNumberOfCalls(5) // Activate only after 5 calls
                .waitDurationInOpenState(Duration.ofSeconds(10)) // 10 seconds in open state
                .permittedNumberOfCallsInHalfOpenState(3) // 3 requests in half-open state
                .recordExceptions(RuntimeException.class) // Record these exceptions as failures
                .build();

        // Create and return a CircuitBreakerRegistry with the custom configuration
        return CircuitBreakerRegistry.of(config);
    }

    @Bean
    public CircuitBreaker customCircuitBreaker(CircuitBreakerRegistry registry) {
        // Register a CircuitBreaker instance
        return registry.circuitBreaker("customCircuitBreaker");
    }
}
Testing Circuit Breakers
Testing a Resilience4j Circuit Breaker with Postman involves simulating requests to your Spring Boot application and observing how the circuit breaker behaves as it transitions between Closed, Open, and Half-Open states.
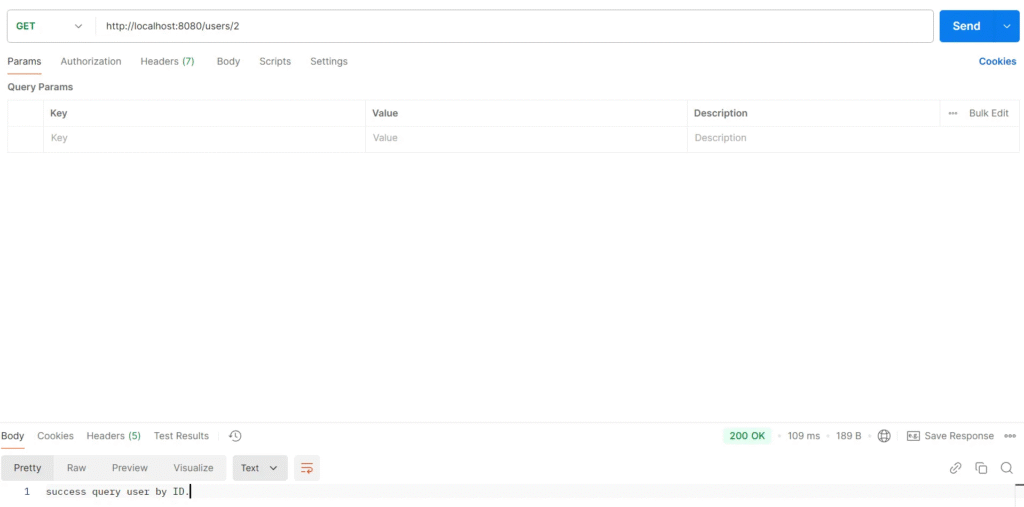
Test: success case scenario
1. Client sends request http://localhost:8080/users/2
2. Server response HTTP 200 OK.
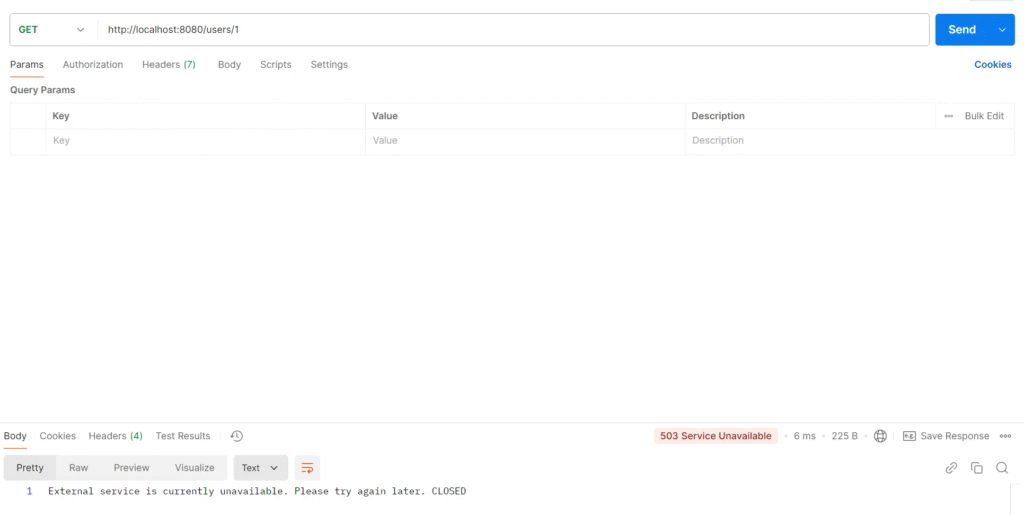
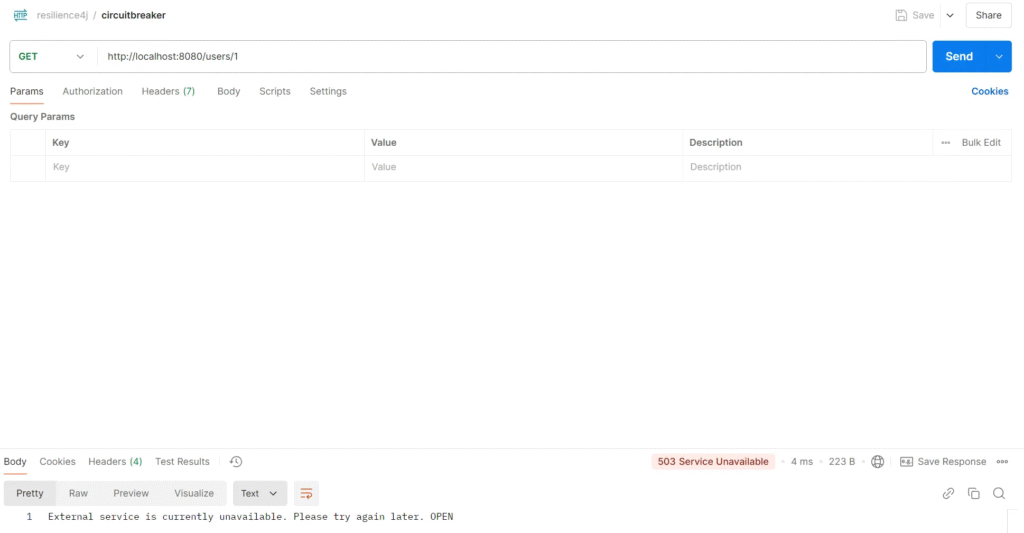
Test: fail case scenario
1. Client sends request http://localhost:8080/users/1
2. Server response HTTP 503 Service Unavailable.
3. Circuit breaker state CLOSED
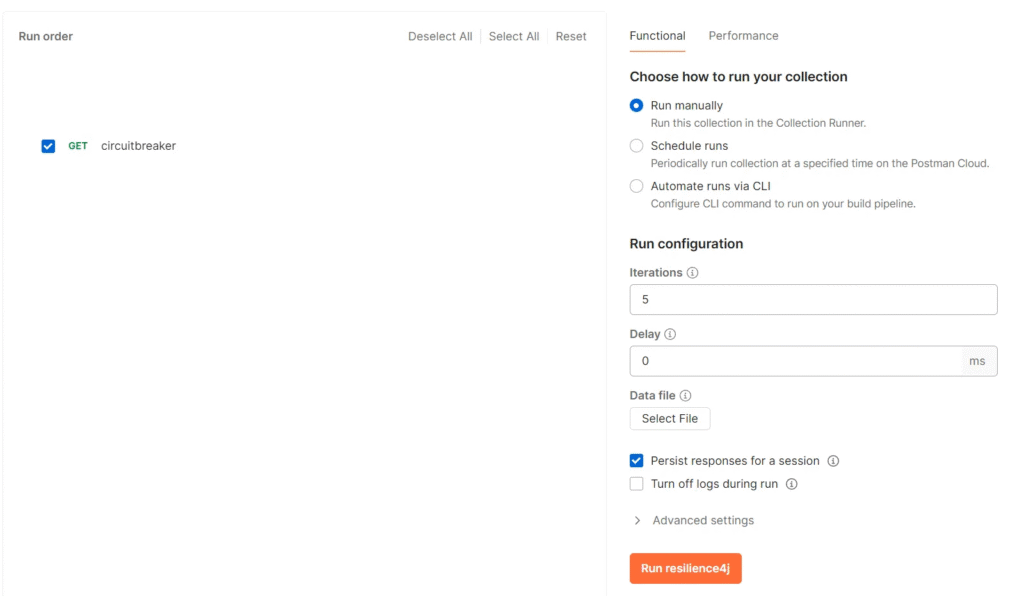
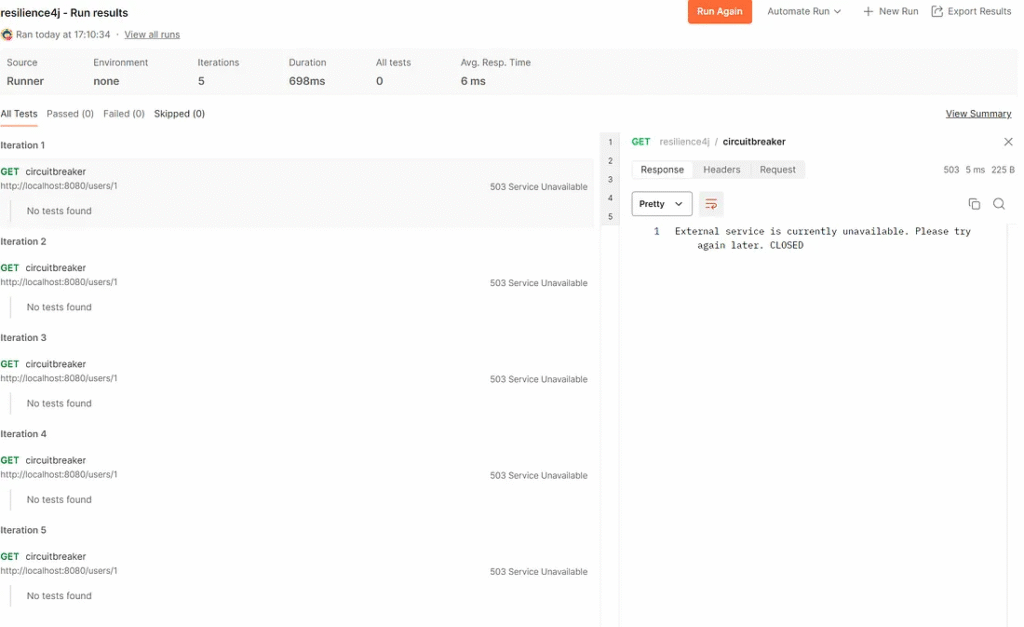
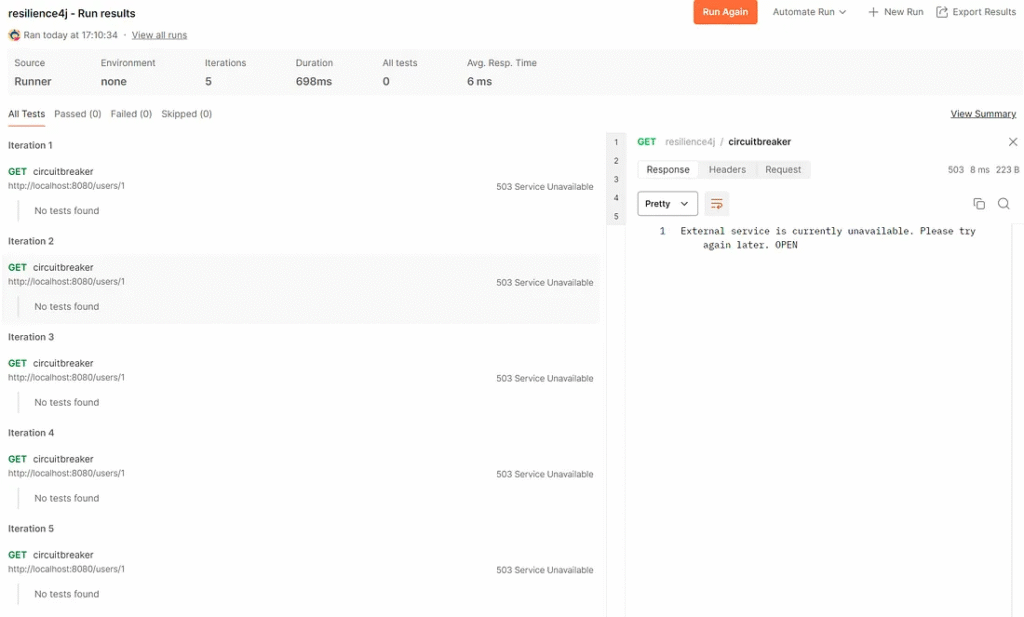
Test: fail multiple times in a case scenario
1. Create a run collection.
2. The client sends a request http://localhost:8080/users/1
3. Server response HTTP 503 Service Unavailable.
4. Circuit breaker state OPEN.
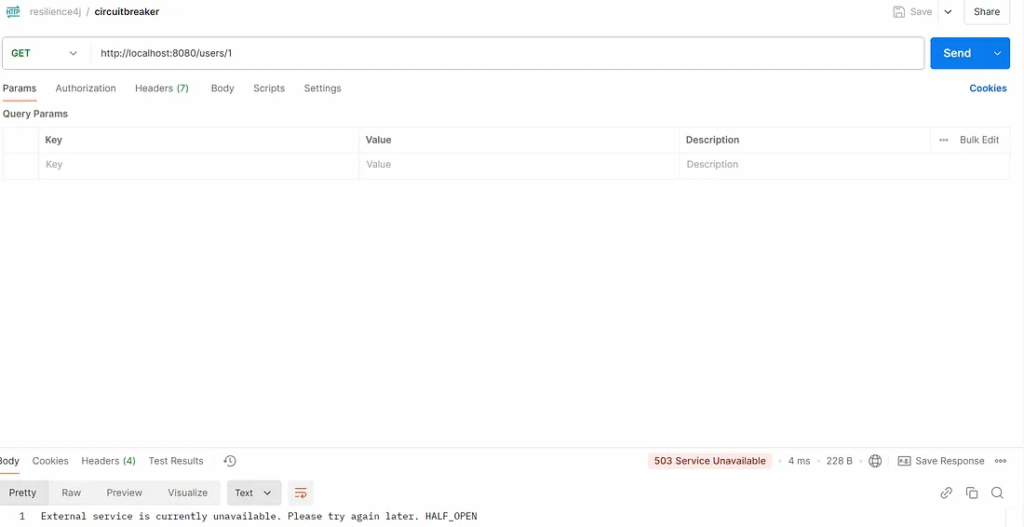
Test: fail multiple times and wait 5 seconds. Case scenario
1. Client sends request http://localhost:8080/users/1
2. Server response HTTP 503 Service Unavailable.
3. Circuit breaker state OPEN.
4. Wait 5 seconds.
5. Client sends request http://localhost:8080/users/1
6. Circuit breaker state change to HALF_OPEN.
Conclusion
Integrating Resilience4j Circuit Breaker with Spring Boot ensures that your application is better equipped to handle unexpected service failures gracefully, providing a seamless user experience even during outages. With features like fallback handling, event publishing, and detailed configurations, Resilience4j offers a powerful toolkit for implementing resilience patterns. As you design and test, remember that continuous monitoring and adjustment are crucial for maintaining the resilience of microservices in production environments.


