Developers constantly seek efficient ways to manage code, automate pipelines, and collaborate securely. GitLab, combined with Docker, offers a powerful platform for these needs. This tutorial will guide you through creating a GitLab server on Docker and integrating it with a Spring Boot project. You’ll learn how to deploy, configure, and automate a CI/CD workflow seamlessly.
Docker simplifies GitLab deployment by isolating it within containers. You’ll gain a clean, reproducible environment that’s easy to scale. Setting up GitLab manually can be a time-consuming process. Fortunately, Docker eliminates most configuration headaches.
In the following sections, you’ll set up GitLab inside Docker, configure users and projects, and then connect it with a Spring Boot application. This guide assumes you have Docker installed on your machine.
Let’s begin the journey toward a robust DevOps setup.
1. Understanding GitLab and Docker
GitLab is more than a Git repository manager. It’s a complete DevOps platform that handles everything from version control to continuous deployment. You can host GitLab on your local machine, a virtual server, or the cloud. However, hosting it with Docker provides flexibility and isolation.
Docker enables applications to run in containers, along with their dependencies. This setup reduces compatibility issues and ensures consistent environments across systems. Developers often use Docker Compose to orchestrate multiple containers.
Running GitLab in Docker offers scalability and convenience. You can easily back up data, migrate the setup, or reset the environment. Also, Docker-based installations minimize the impact of updates on your system.
By understanding how GitLab and Docker interact, you’ll set a solid foundation for the steps that follow.
2. Prerequisites for the Setup
Before starting, verify that Docker and Docker Compose are installed on your system. You can check their versions using:
docker --version
docker-compose --version
Ensure your machine meets the following requirements:
- Memory: At least 4 GB RAM
- CPU: Dual-core processor or higher
- Storage: 20 GB free space
- OS: Linux, macOS, or Windows (with WSL2 support)
Next, create a dedicated directory for GitLab. This directory will store configuration files, logs, and persistent data. Keeping them organized ensures smooth maintenance.
Run the following commands:
mkdir gitlab-docker
cd gitlab-docker
You’ll also need to open ports 80, 443, and 22 for HTTP, HTTPS, and SSH.
Now that you’ve met all prerequisites, it’s time to configure GitLab inside Docker.
3. Creating the Docker Compose File
A Docker Compose file defines how services interact with each other. You’ll use it to set up GitLab and its dependencies. Inside your gitlab-docker directory, create a file named docker-compose.yml.
Add this configuration:
services:
  gitlab:
    image: gitlab/gitlab-ce:latest
    restart: always
    hostname: 'gitlab.example.com'
    environment:
      GITLAB_OMNIBUS_CONFIG: |
        external_url 'http://gitlab.example.com'
    ports:
      - '80:80'
      - '443:443'
      - '22:22'
    volumes:
      - ./config:/etc/gitlab
      - ./logs:/var/log/gitlab
      - ./data:/var/opt/gitlab
This configuration runs GitLab Community Edition (CE) with data persistence. The volumes section ensures your configuration survives container restarts.
After saving the file, run:
docker-compose up -d
Docker will pull the GitLab image and launch it. Wait a few minutes for initialization to complete.
Next, you’ll access the web interface and perform initial setup.
To find the password for the default root user, you need to execute a command against the running GitLab container:
Find your container name or ID using docker ps. (Assuming your container is named gitlab):
docker exec -it gitlab-docker-gitlab-1 grep 'Password:' /etc/gitlab/initial_root_password
Password: GvkiSa4IX7AR0ckhmInMwOA+v/0TQEPn9AmTUEGlyes=
Important Notes:
- The password file (
/etc/gitlab/initial_root_password) is automatically deleted after the first container restart or after 24 hours of the container being up and running. - Alternatively, you can set a specific initial root password by including the following environment variable or configuration in your Docker setup (e.g., in a
docker runcommand ordocker-compose.ymlfile) upon first run:
-e GITLAB_OMNIBUS_CONFIG="gitlab_rails['initial_root_password'] = 'YOUR_SECURE_PASSWORD'"
4. Accessing and Configuring GitLab
Once the container is running, open your browser and navigate to:
http://localhost
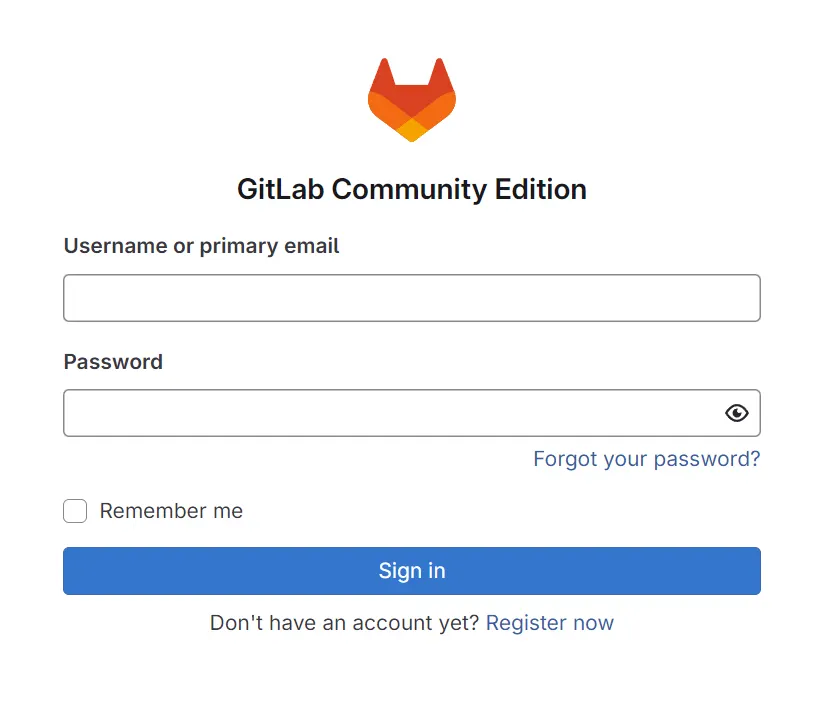
GitLab’s initial page prompts you to set an administrator password. Choose a strong one and store it securely. After logging in, you’ll land on the GitLab dashboard.
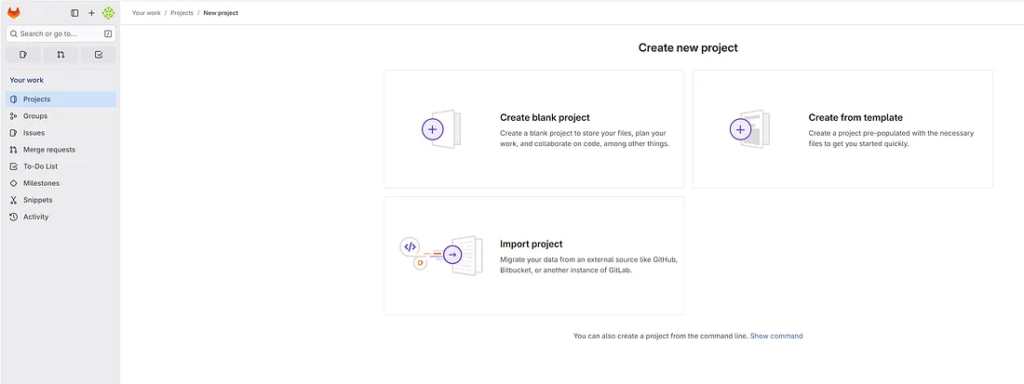
From the dashboard, you can create new groups, users, and projects. GitLab organizes repositories into groups, helping you manage multiple projects efficiently.
You can also configure email notifications, SSH keys, and CI/CD runners. Navigate to Admin Area → Overview → Runners to register one later.
The default admin user is root. To prevent unauthorized access, create separate user accounts for each member of your team.
With GitLab configured, you’re ready to integrate it with your Spring Boot application.

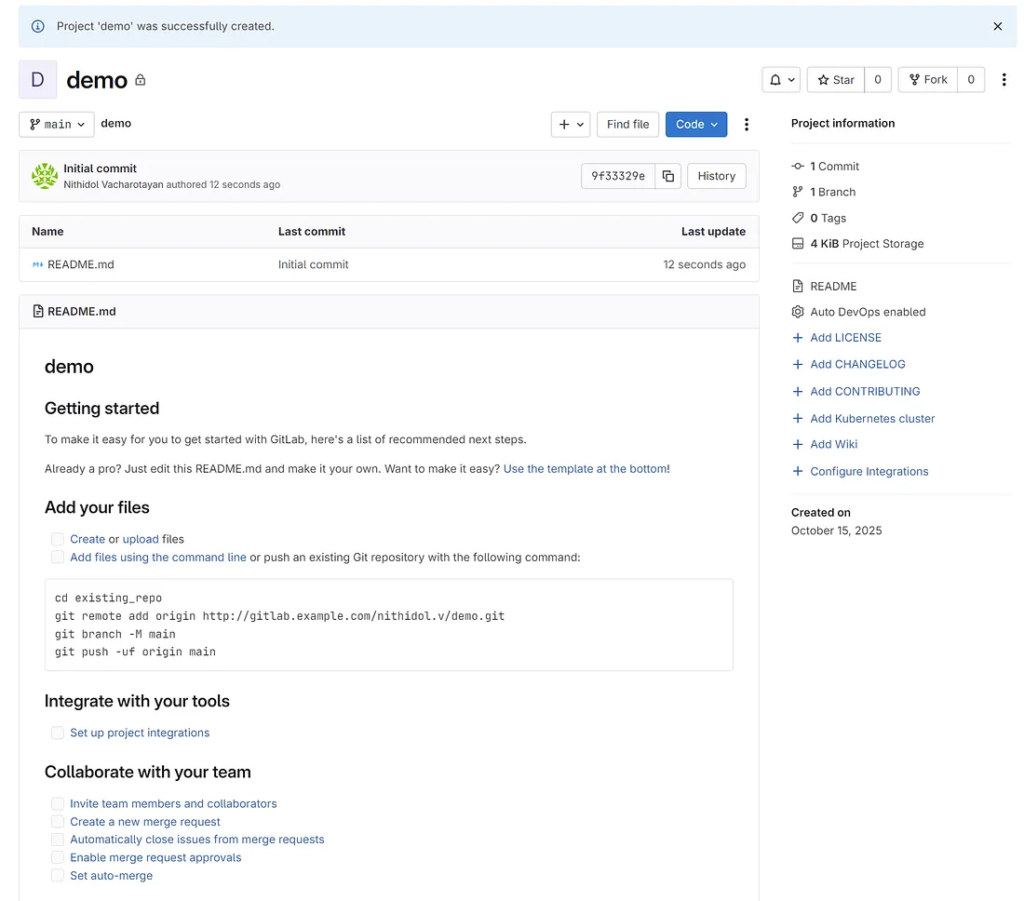
Create project
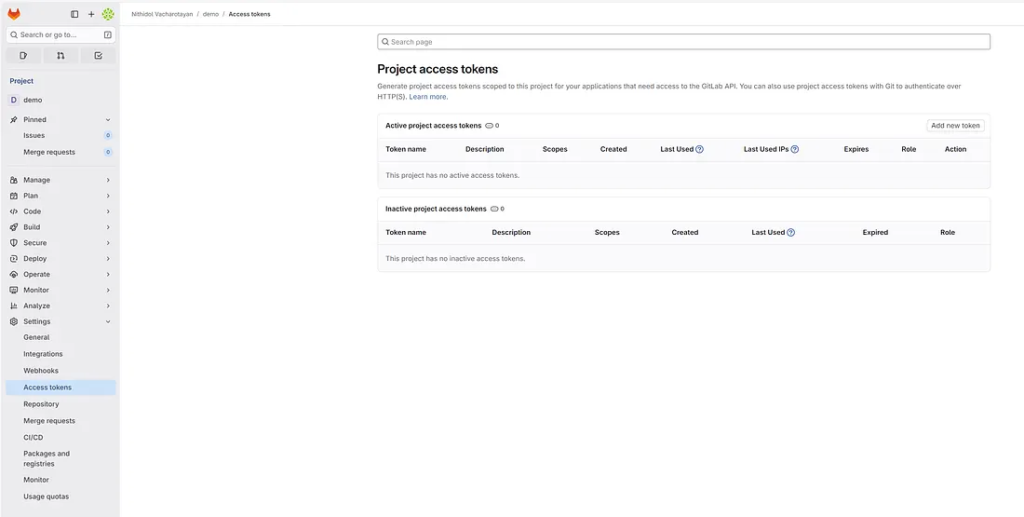
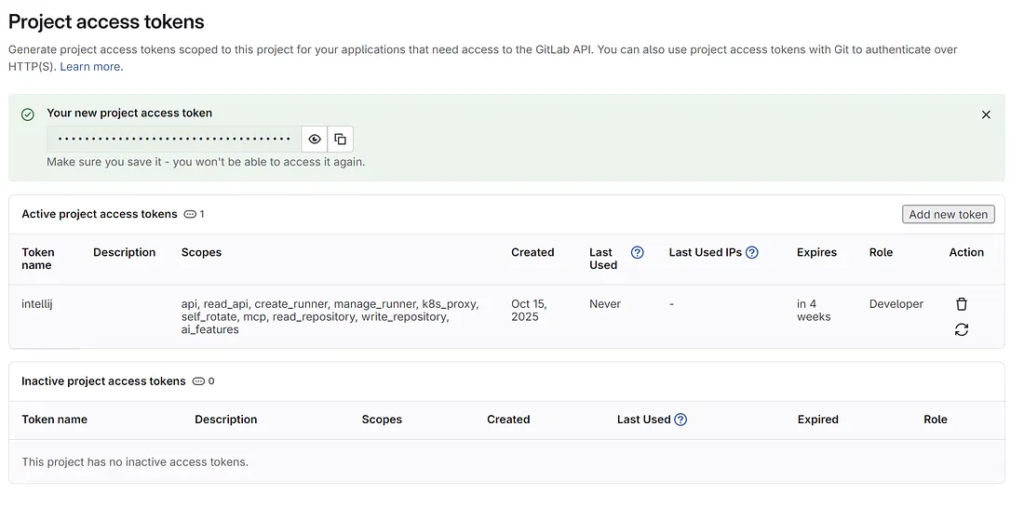
Create Access Token
Go to “Settings” and select “Access tokens”

5. Setting Up a Spring Boot Project
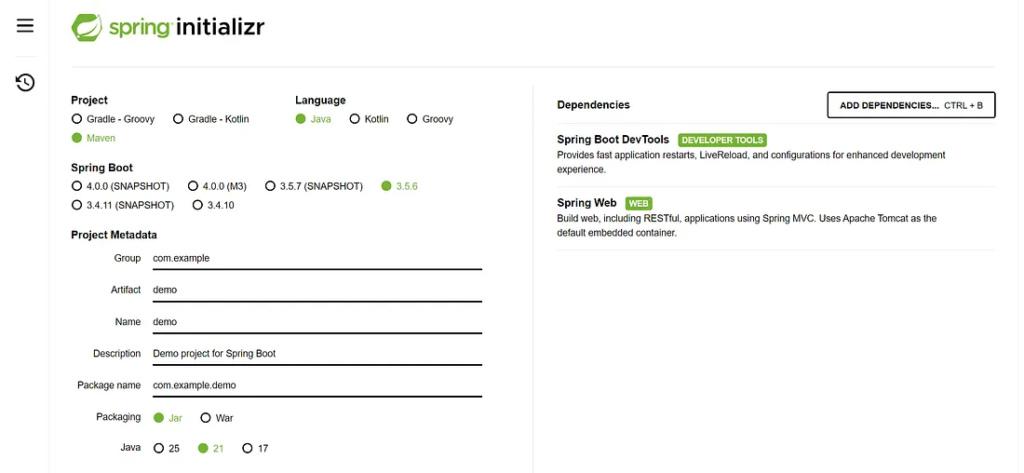
Spring Boot simplifies Java application development by reducing the need for boilerplate code. To begin, open your IDE or use the Spring Initializr at start.spring.io.
Choose the following settings:
- Project: Maven
- Language: Java
- Spring Boot: Latest stable version
- Dependencies: Spring Web, Spring Boot DevTools, Lombok
Click Generate to download the project. Extract the ZIP and open it in your IDE. You’ll see a structure similar to this:
src/
 └── main/
      ├── java/
      │     └── com.example.demo/
      │           └── DemoApplication.java
      └── resources/
            ├── application.properties
Run the application with:
mvn spring-boot:run
Verify it works by visiting:
http://localhost:8080
You’ve now created a functional Spring Boot app. The next step connects it with GitLab for source control and CI/CD.
6. Connecting Spring Boot to GitLab
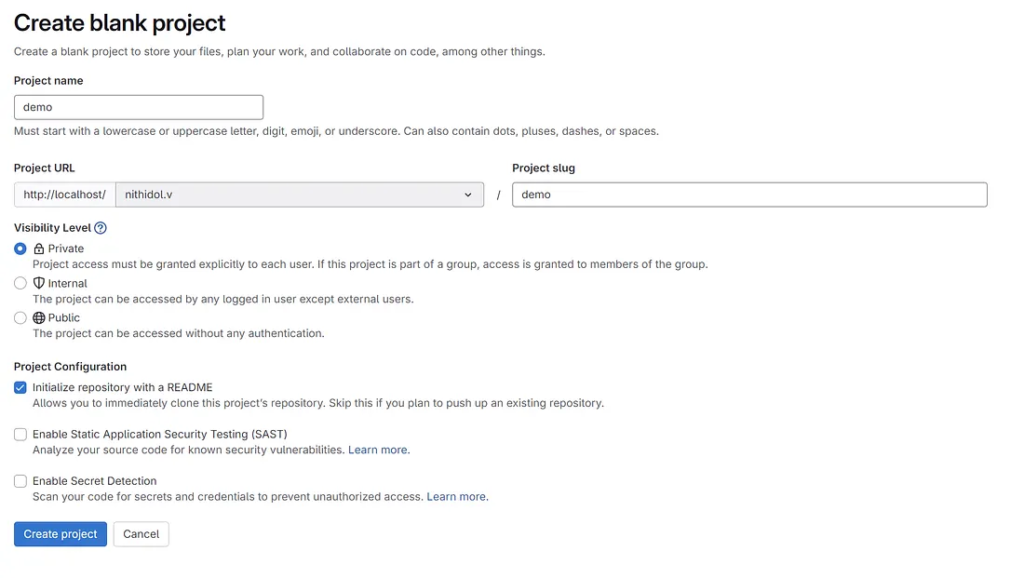
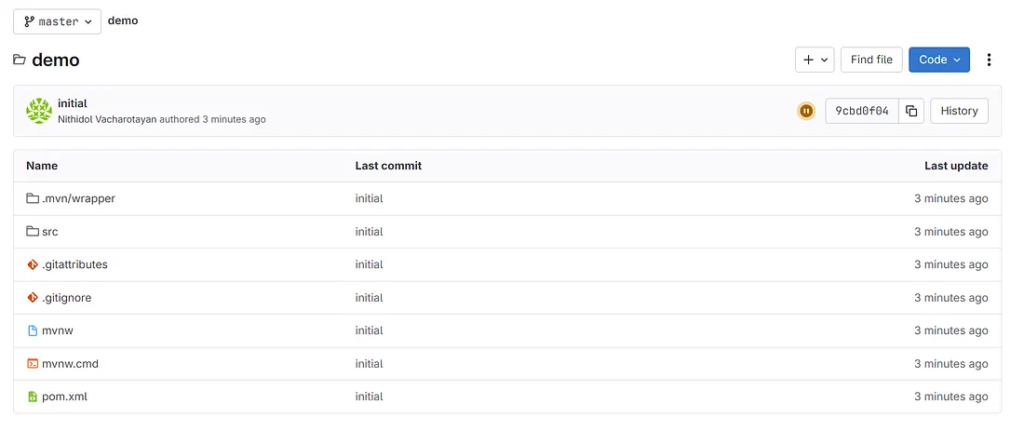
Return to your GitLab dashboard and create a new project named springboot-demo. Select “Create blank project” and make it either public or private.
Initialize Git in your project folder:
git init
git remote add origin http://localhost/root/springboot-demo.git
Add your files and push the project:
git add .
git commit -m "Initial commit"
git push -u origin master
GitLab will host your code repository. Visit the project page to confirm the upload.
Using GitLab’s built-in features, you can manage merge requests, code reviews, and issue tracking effortlessly.
Next, you’ll set up an automated pipeline to build and test the Spring Boot project.
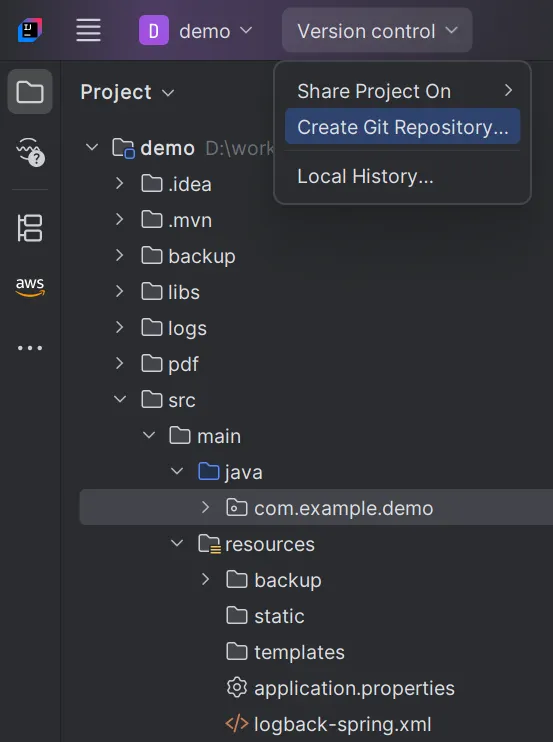
Create a Git with IntelliJ IDEA
- Create Git Repository
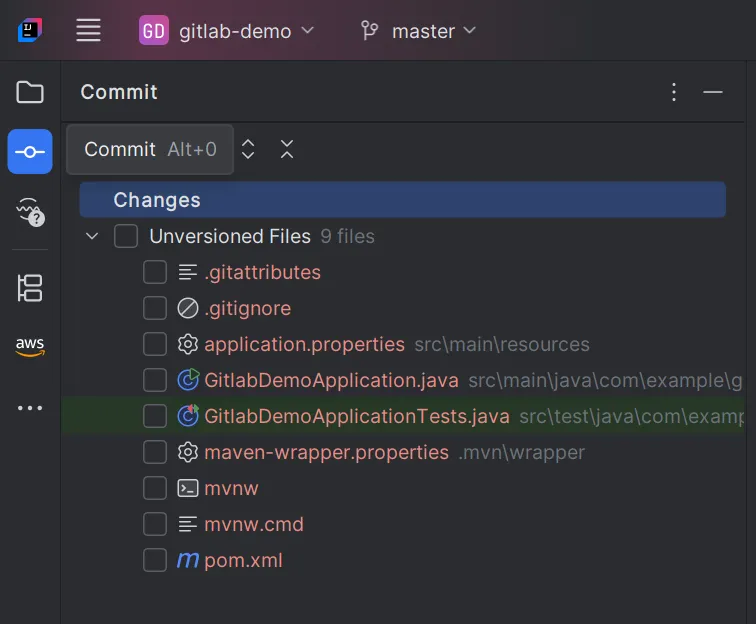
2. List files not committed.
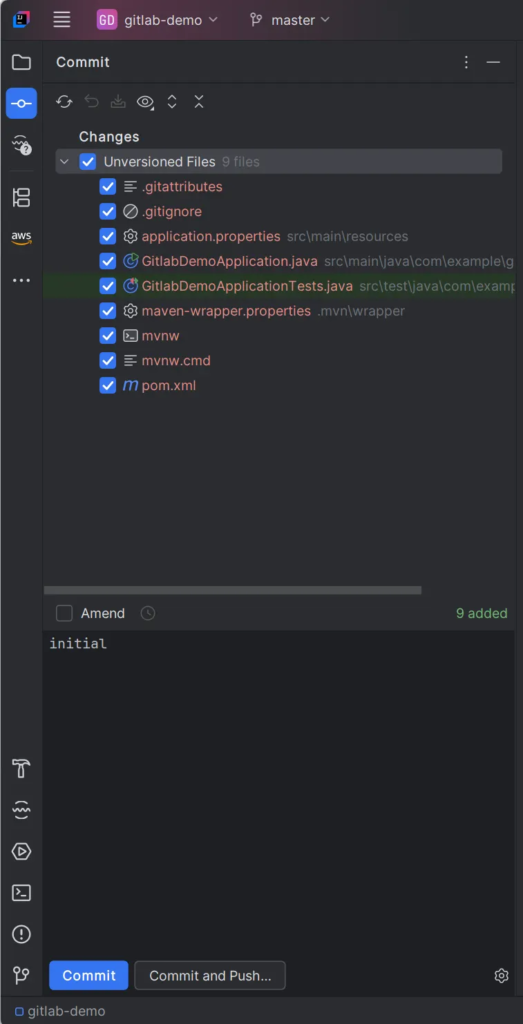
3. Select files to commit
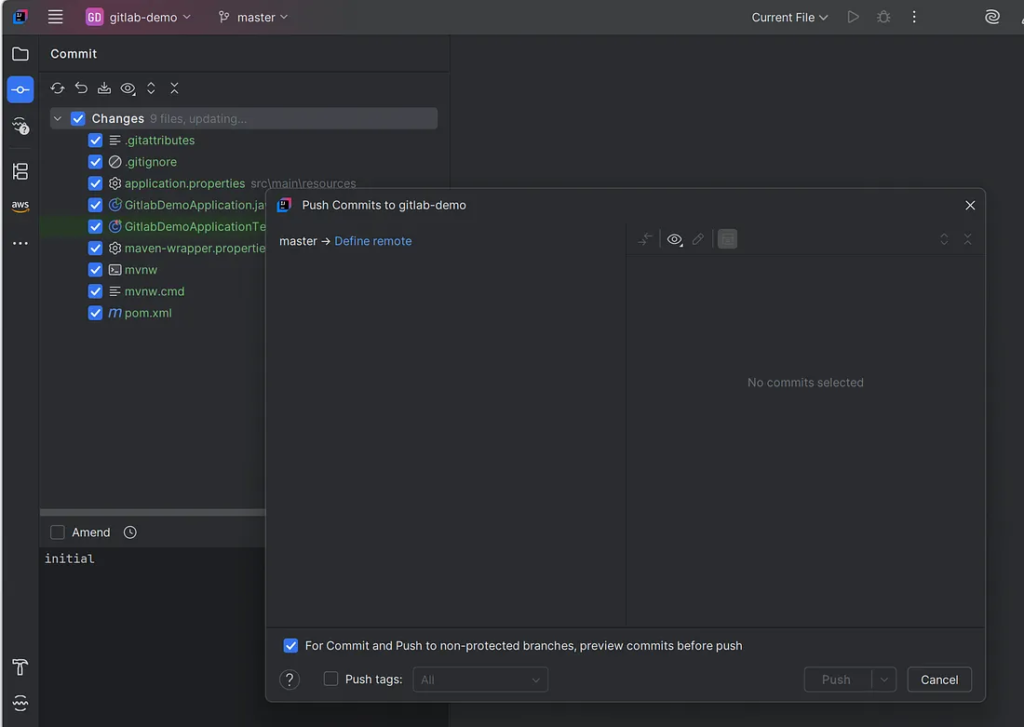
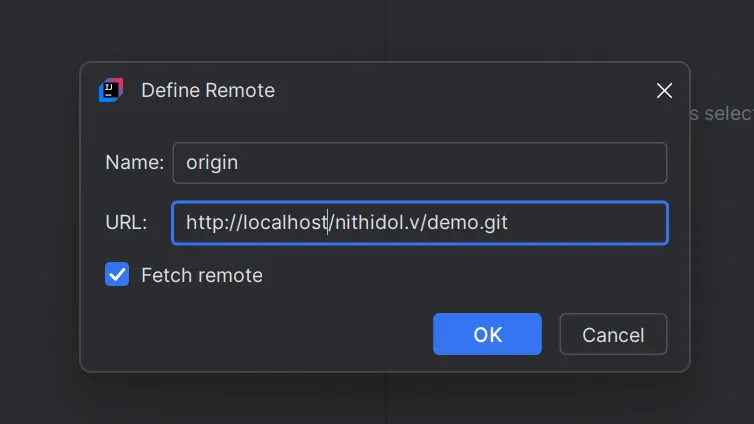
4. Select a remote git server
5. Copy the git project path “Clone with HTTP” and change “git.example.com” to “localhost”

6. Git project URL
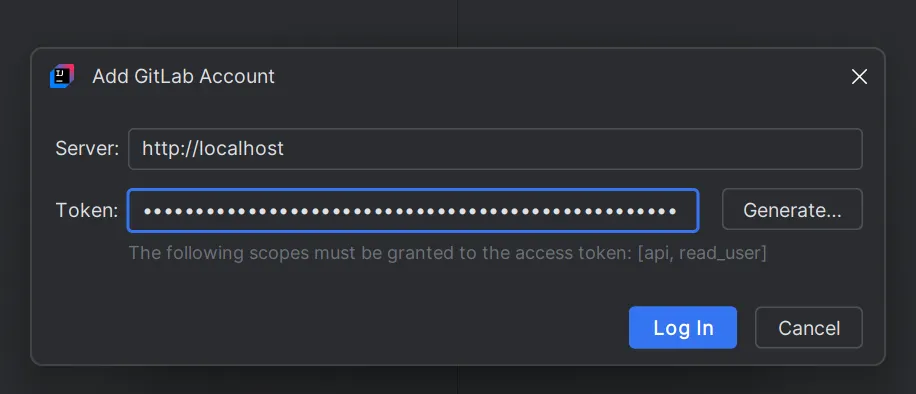
7. Input token
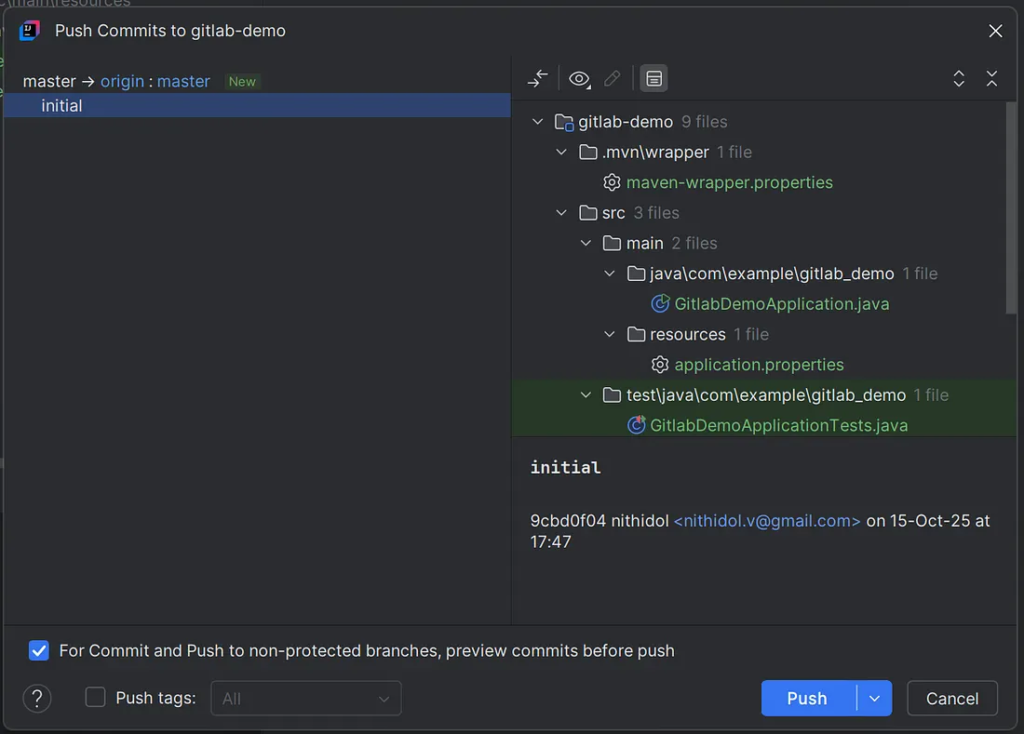
8. Push code
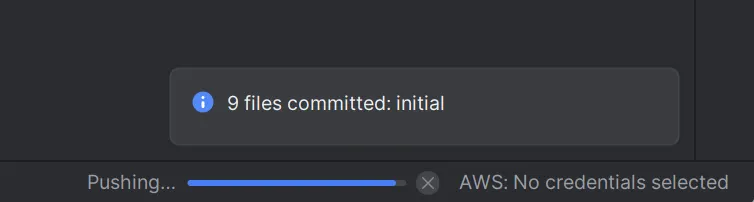
9. Code commit to the remote server
10. Check Project

7. Configuring GitLab CI/CD for Spring Boot
Continuous Integration (CI) ensures every change in your project builds and tests automatically. GitLab CI/CD uses a file named .gitlab-ci.yml to define pipeline stages.
Create this file in your project root:
stages:
- build
- test
variables:
MAVEN_CLI_OPTS: "-B -Dmaven.test.failure.ignore=true"
build-job:
stage: build
image: maven:3.9-eclipse-temurin-21
script:
- mvn $MAVEN_CLI_OPTS clean package
test-job:
stage: test
image: maven:3.9-eclipse-temurin-21
script:
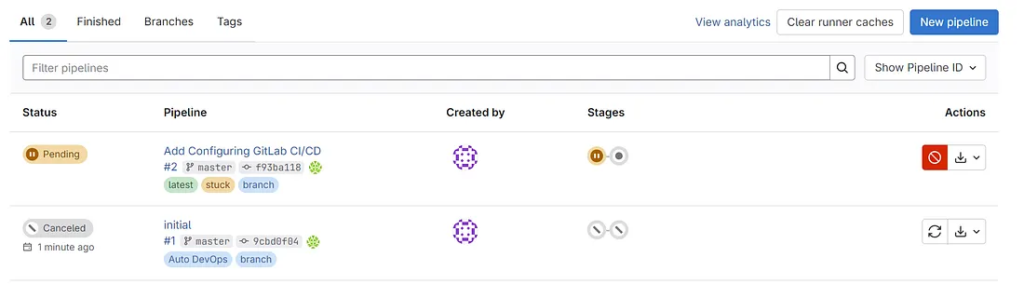
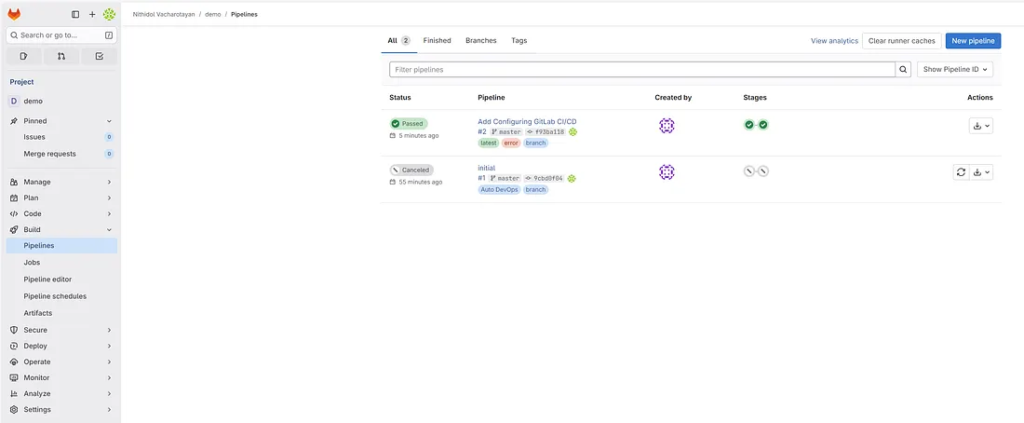
- mvn testCommit and push this file to GitLab. Open the CI/CD → Pipelines tab in your project. You’ll see your first build run automatically.
Each stage uses a Maven Docker image to compile and test your code.
With every commit, GitLab triggers this pipeline. Failures alert developers early, preventing broken code from reaching production.
8. Using GitLab Runner in Docker
To execute pipelines, you need a GitLab Runner. It processes CI/CD jobs defined in your project. Running it in Docker keeps your setup portable and clean.
Add the service “gitlab-runner” in docker-compose.yml.
 gitlab-runner:
    image: gitlab/gitlab-runner:latest
    container_name: gitlab-runner
    # Ensure the container starts automatically
    restart: always
    # Mount the Docker socket to allow the runner (using the Docker executor)
    # to create containers for your CI/CD jobs. This is essential for DinD (Docker-in-Docker).
    volumes:
      - /var/run/docker.sock:/var/run/docker.sock
      # Mount a volume to store the runner's configuration (config.toml)
      # on the host machine for persistence.
      - ./gitlab-runner-config:/etc/gitlab-runner
After it starts, register it:
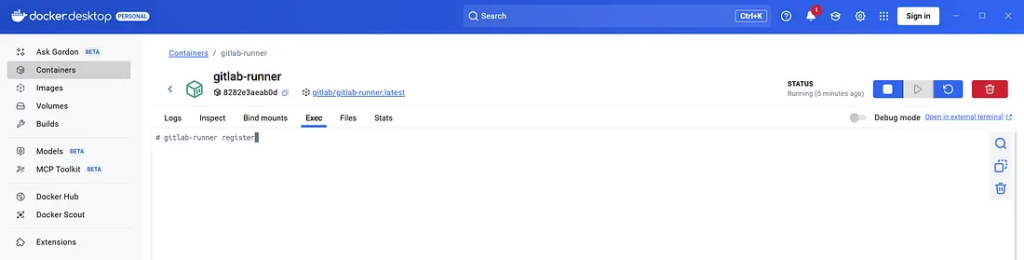
docker exec -it gitlab-runner gitlab-runner register
Alternative on Docker Desktop
Provide the following:
- GitLab URL:
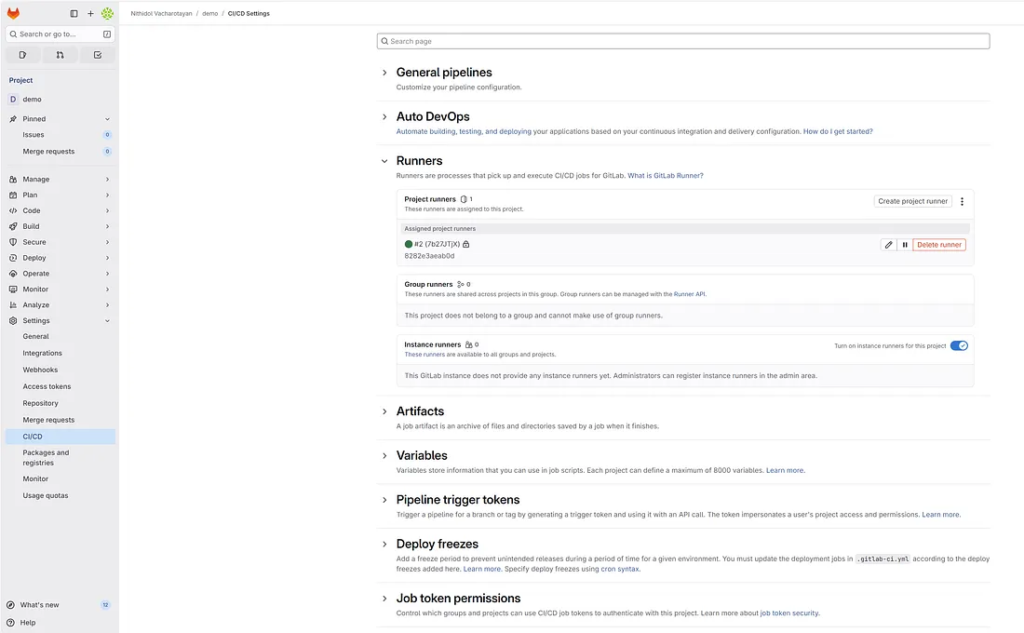
http://gitlab.example.com/ - Token: Found under your project’s Settings → CI/CD → Runners
- Executor:
docker - Default image:
maven:3.9-eclipse-temurin-21
Once registration completes, your runner appears as “active” in GitLab.
Config network Docker
Find the Docker Network Name: Run docker network ls and look for the network created by your docker-compose.yml. It usually follows the pattern: <directory_name>_default.
> docker network ls
NETWORK ID     NAME                            DRIVER    SCOPE
32c4942cff4a   bridge                          bridge    local
4caefc2195af   gitlab-docker_default           bridge    local
90e23212ded7   host                            host      local
61218b2c7675   none                            null      local
Edit config.toml and add network_mode: In the [runners.docker] section, specify this network name:
concurrent = 1
check_interval = 0
shutdown_timeout = 0

[session_server]
  session_timeout = 1800

[[runners]]
  name = "8282e3aeab0d"
  url = "http://gitlab.example.com"
  id = 2
  token = "glrtr-7b27JTjXr7jWPKzBs6GLOm86MQpwOjEKdDozCw.01.120mcbkdw"
  token_obtained_at = 2025-10-15T12:13:49Z
  token_expires_at = 0001-01-01T00:00:00Z
  clone_url = "http://gitlab"
  executor = "docker"
  [runners.cache]
    MaxUploadedArchiveSize = 0
    [runners.cache.s3]
    [runners.cache.gcs]
    [runners.cache.azure]
  [runners.docker]
    tls_verify = false
    image = "maven:3.9-eclipse-temurin-21"
    network_mode = "gitlab-docker_default"
    privileged = false
    disable_entrypoint_overwrite = false
    oom_kill_disable = false
    disable_cache = false
    volumes = ["/cache"]
    shm_size = 0
    network_mtu = 0
9. Testing the CI/CD Workflow
Push a new commit to test your setup:
echo "// Test CI/CD" >> README.md
git add .
git commit -m "Test pipeline"
git push
GitLab will trigger a pipeline automatically. Navigate to CI/CD → Pipelines to watch it execute.
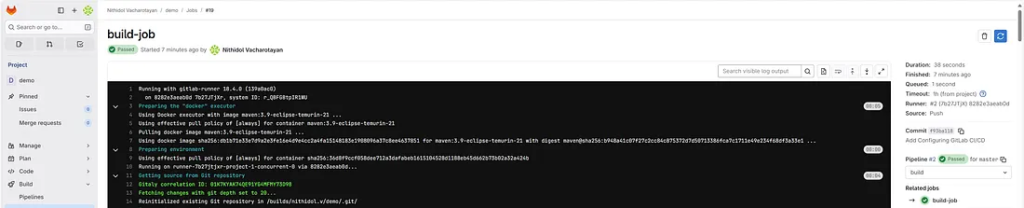
If everything is configured correctly, both the build and test stages will pass. Each job runs independently within a container.
You can view detailed logs to diagnose issues. These logs display Maven’s output during the build.
Testing your workflow regularly ensures reliability before adding deployment stages.
Next, you’ll learn to extend the pipeline to deploy the app automatically.
10. Managing GitLab Backups
Maintaining backups ensures you can recover from unexpected failures. Docker volumes hold GitLab’s configuration, logs, and data. To back them up, run:
docker exec -t gitlab gitlab-backup create
This command stores backup files under /var/opt/gitlab/backups.
You can also automate this process with a cron job. Regular backups reduce the risk of data loss.
To restore from a backup:
docker exec -it gitlab gitlab-backup restore BACKUP=timestamp
Keep backups on external storage for extra safety.
With a solid backup strategy, your GitLab instance remains resilient and reliable.
11. Optimizing Docker Resources
Efficient resource usage enhances performance. Start by removing unused images and containers:
docker system prune -a
You can also adjust Docker’s memory allocation through its settings. Increasing resources improves build speed, especially for Maven-based projects.
Use lightweight base images when building containers to save space.
Monitoring resource consumption with tools like cAdvisor helps you identify bottlenecks.
Optimizing Docker ensures that your GitLab and runners remain responsive, even under heavy workloads.
Finally
You’ve now built a complete DevOps environment — GitLab running in Docker and integrated with a Spring Boot project. From configuration to CI/CD and deployment, every step contributes to a scalable and automated workflow.
GitLab empowers teams to collaborate, test, and deploy efficiently. Docker ensures consistency and portability. Together, they form a modern solution for software development.
Continue exploring GitLab’s advanced features, such as Kubernetes integration, container registry, and code analytics.
With these tools and practices, you can maintain productivity, code quality, and delivery speed in any project.
This article was originally published on Medium.