Creating a secure, visually appealing authentication interface is essential for any modern web application. Angular 20 and PrimeNG provide everything you need to craft a seamless login and registration experience. In this tutorial, you’ll learn how to build a beautiful authentication UI featuring PrimeNG Form components, Angular Reactive Forms, form validation, and dynamic routing between login and signup views.
Setting Up Your Angular 20 Project

Designing the Authentication Layout
A good authentication page strikes a balance between simplicity and clarity. You’ll create a split layout with one side for login and another for registration.
Start by creating two components:
ng generate component auth/login
ng generate component auth/register
> ng generate component auth/login
CREATE src/app/auth/login/login.spec.ts (544 bytes)
CREATE src/app/auth/login/login.ts (192 bytes)
CREATE src/app/auth/login/login.css (0 bytes)
CREATE src/app/auth/login/login.html (21 bytes)
> ng generate component auth/register
CREATE src/app/auth/register/register.spec.ts (565 bytes)
CREATE src/app/auth/register/register.ts (204 bytes)
CREATE src/app/auth/register/register.css (0 bytes)
CREATE src/app/auth/register/register.html (24 bytes)
Next, configure Angular routing for smooth navigation.
// app-routing.module.ts
import { NgModule } from '@angular/core';
import { RouterModule, Routes } from '@angular/router';
import { LoginComponent } from './auth/login/login.component';
import { RegisterComponent } from './auth/register/register.component';

const routes: Routes = [
  { path: '', redirectTo: 'login', pathMatch: 'full' },
  { path: 'login', component: Login },
  { path: 'register', component: Register }
];

@NgModule({
  imports: [RouterModule.forRoot(routes)],
  exports: [RouterModule]
})
export class AppRoutingModule {}
Now, users can easily move between the login and signup screens.
Creating the Login Form with Reactive Forms
Reactive Forms provide flexibility and robust validation control.
In your login.ts file, define the form group and validation rules.
import { Component, OnInit } from '@angular/core';
import { FormBuilder, FormGroup, Validators } from '@angular/forms';
import { InputTextModule } from 'primeng/inputtext';
import { FloatLabelModule } from 'primeng/floatlabel'
import { PasswordModule } from 'primeng/password';
import { FormsModule } from '@angular/forms';
import { ReactiveFormsModule } from '@angular/forms';
import { ButtonModule } from 'primeng/button';
import { MessageModule } from 'primeng/message';
import { Message } from 'primeng/message';
import { RouterLink } from '@angular/router';

@Component({
  selector: 'app-login',
  templateUrl: './login.html',
  styleUrls: ['./login.css'],
  imports: [InputTextModule, PasswordModule, FormsModule, FloatLabelModule, ReactiveFormsModule, ButtonModule, MessageModule, Message, RouterLink],
})
export class LoginComponent implements OnInit {
  loginForm!: FormGroup;
  submitted = false;

  constructor(private fb: FormBuilder) {}

  ngOnInit(): void {
    this.loginForm = this.fb.group({
      email: ['', [Validators.required, Validators.email]],
      password: ['', [Validators.required, Validators.minLength(6)]],
    });
  }

  onSubmit(): void {
    this.submitted = true;
    if (this.loginForm.invalid) return;
    console.log('Login Data:', this.loginForm.value);
  }
}
Modify login.spec.ts
import { ComponentFixture, TestBed } from '@angular/core/testing';

import { LoginComponent } from './login';

describe('Login', () => {
  let component: LoginComponent;
  let fixture: ComponentFixture<LoginComponent>;

  beforeEach(async () => {
    await TestBed.configureTestingModule({
      imports: [LoginComponent]
    })
    .compileComponents();

    fixture = TestBed.createComponent(LoginComponent);
    component = fixture.componentInstance;
    fixture.detectChanges();
  });

  it('should create', () => {
    expect(component).toBeTruthy();
  });
});
Styling with PrimeNG’s p-floatlabel and p-password
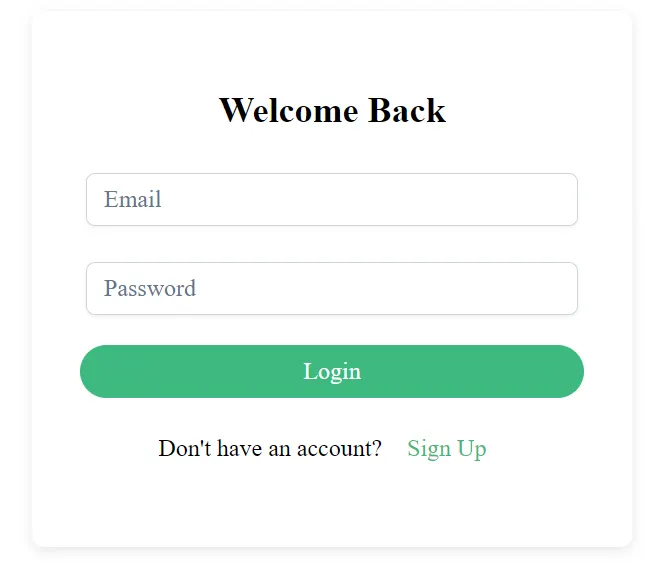
PrimeNG’s p-floatlabel adds modern floating labels, keeping the form clean and interactive.
Update your login.html:
<div class="auth-container">
  <h2>Welcome Back</h2>
  <form [formGroup]="loginForm" (ngSubmit)="onSubmit()">
    <div class="card-container">
      <div class="block font-bold p-1 border-round mb-3 w-full">
        <p-floatlabel variant="on" class="w-full">
          <input pInputText formControlName="email" id="email" class="w-full" />
          <label for="email">Email</label>
        </p-floatlabel>
        @if (submitted && loginForm.get('email')?.invalid) {
        <div class="text-left m-1">
          @if (loginForm.get('email')?.errors?.['required']) {
          <p-message severity="error" size="small" variant="simple">Email is required.</p-message>
          } @if (loginForm.get('email')?.errors?.['email']) {
          <p-message severity="error" size="small" variant="simple">Enter a valid email.</p-message>
          }
        </div>
        }
      </div>

      <div class="block font-bold p-1 border-round mb-3 w-full">
        <p-floatlabel variant="on" class="w-full">
          <p-password
            id="password"
            formControlName="password"
            [feedback]="false"
            class="w-full"
            [inputStyle]="{ width: '100%' }"
          ></p-password>
          <label for="password">Password</label>
        </p-floatlabel>
      </div>

      <div class="block border-round w-full">
        <button
          pButton
          type="submit"
          label="Login"
          class="p-button-rounded p-button-primary w-full"
        ></button>
      </div>
    </div>
  </form>

  <p class="switch">
    Don't have an account?
    <p-button label="Sign Up" link routerLink="/register" type="button"> </p-button>
  </p>
</div>
Each input now floats elegantly when focused. The p-password component automatically hides user input and ensures accessibility.
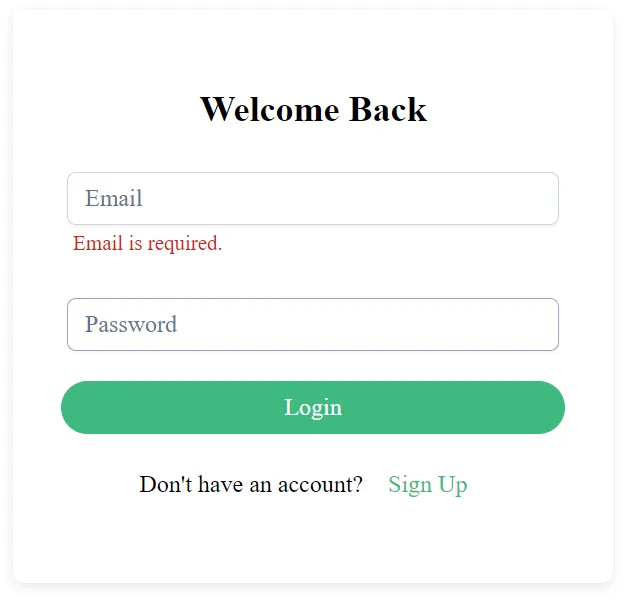
Displaying Error Messages and Input States
Good form design communicates errors clearly. You’ll use Angular’s conditional classes and small helper text.
@if (submitted && loginForm.get('email')?.invalid) {
<div class="text-left">
  @if (loginForm.get('email')?.errors?.['required']) {
  <p-message class="mt-3" severity="error" size="small" >Email is required.</p-message>
  } @if (loginForm.get('email')?.errors?.['email']) {
  <p-message class="mt-3" severity="error" size="small" >Enter a valid email.</p-message>
  }
</div>
}
Enhance user experience with state-based styles in login.scss:
.auth-container {
  max-width: 400px;
  margin: auto;
  padding: 2rem;
  border-radius: 8px;
  background: #fff;
  box-shadow: 0 2px 8px rgba(0, 0, 0, 0.1);

  h2 {
    text-align: center;
    margin-bottom: 1.5rem;
  }

  .error small {
    color: #d9534f;
    display: block;
    margin-top: 0.5rem;
  }

  .switch {
    text-align: center;
    margin-top: 1rem;
  }
}
Modify app.config.ts
Component update failed: NG05105: Unexpected synthetic property @messageAnimation found. Please make sure that:
  - Make sure provideAnimationsAsync(), provideAnimations() or provideNoopAnimations() call was added to a list of providers used to bootstrap an application.
  - There is a corresponding animation configuration named @messageAnimation defined in the animations field of the @Component decorator (see https://angular.dev/api/core/Component#animations).
Error: NG05105: Unexpected synthetic property @messageAnimation found. Please make sure that:
  - Make sure provideAnimationsAsync(), provideAnimations() or provideNoopAnimations() call was added to a list of providers used to bootstrap an application.
...
import { bootstrapApplication } from '@angular/platform-browser';
import { provideAnimationsAsync } from '@angular/platform-browser/animations/async';
import { AppComponent } from './app/app.component';

bootstrapApplication(AppComponent, {
  providers: [
    provideAnimationsAsync(),
    // ... your other providers
  ]
});
Launch an application
ng serve
http://localhost:4200/login
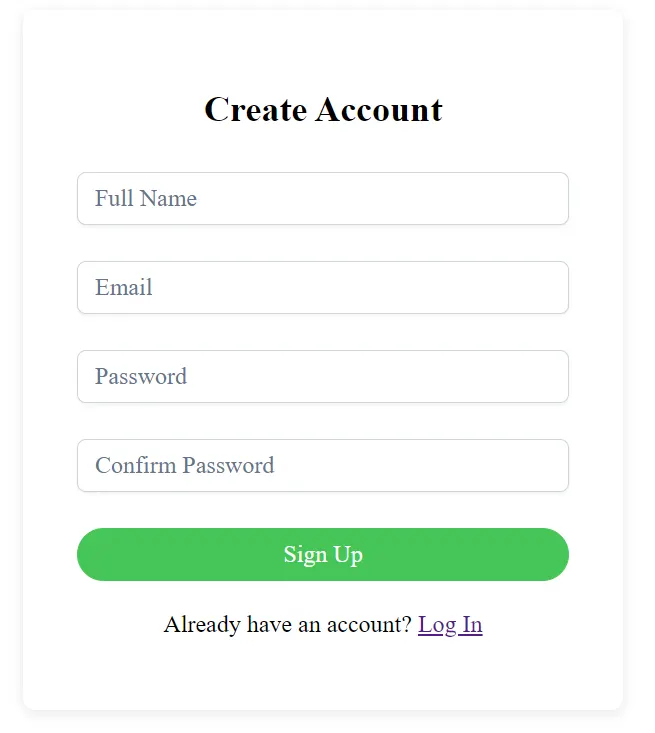
Building the Registration Form
Now, create the registration component with similar validation logic.
import { Component, OnInit } from '@angular/core';
import { FormBuilder, FormGroup, FormsModule, ReactiveFormsModule, Validators } from '@angular/forms';
import { RouterLink } from '@angular/router';
import { ButtonModule } from 'primeng/button';
import { FloatLabelModule } from 'primeng/floatlabel';
import { InputTextModule } from 'primeng/inputtext';
import { MessageModule } from 'primeng/message';
import { PasswordModule } from 'primeng/password';

@Component({
  selector: 'app-register',
  templateUrl: './register.html',
  styleUrls: ['./register.css'],
  imports: [InputTextModule, PasswordModule, FormsModule, FloatLabelModule, ReactiveFormsModule, ButtonModule, MessageModule, RouterLink],
})
export class RegisterComponent implements OnInit {
  registerForm!: FormGroup;
  submitted = false;

  constructor(private fb: FormBuilder) {}

  ngOnInit(): void {
    this.registerForm = this.fb.group({
      name: ['', Validators.required],
      email: ['', [Validators.required, Validators.email]],
      password: ['', [Validators.required, Validators.minLength(6)]],
      confirmPassword: ['', Validators.required]
    }, { validator: this.passwordMatch });
  }

  passwordMatch(form: FormGroup) {
    return form.get('password')?.value === form.get('confirmPassword')?.value
      ? null : { mismatch: true };
  }

  onSubmit(): void {
    this.submitted = true;
    if (this.registerForm.invalid) return;
    console.log('Register Data:', this.registerForm.value);
  }
}
Modify register.spec.ts
import { ComponentFixture, TestBed } from '@angular/core/testing';

import { RegisterComponent } from './register';

describe('Register', () => {
  let component: RegisterComponent;
  let fixture: ComponentFixture<RegisterComponent>;

  beforeEach(async () => {
    await TestBed.configureTestingModule({
      imports: [RegisterComponent]
    })
    .compileComponents();

    fixture = TestBed.createComponent(RegisterComponent);
    component = fixture.componentInstance;
    fixture.detectChanges();
  });

  it('should create', () => {
    expect(component).toBeTruthy();
  });
});
Then add the registration form markup.
<div class="auth-container">
  <h2>Create Account</h2>
  <form [formGroup]="registerForm" (ngSubmit)="onSubmit()">
    <div class="card-container">
      <div class="block font-bold p-1 border-round mb-3 w-full">
        <p-floatlabel variant="on" class="w-full">
          <input pInputText formControlName="name" id="name" class="w-full" />
          <label for="name">Full Name</label>
        </p-floatlabel>
      </div>

      <div class="block font-bold p-1 border-round mb-3 w-full">
        <p-floatlabel variant="on" class="w-full">
          <input pInputText formControlName="email" id="email" class="w-full" />
          <label for="email">Email</label>
        </p-floatlabel>
      </div>

      <div class="block font-bold p-1 border-round mb-3 w-full">
        <p-floatlabel variant="on" class="w-full">
          <p-password
            formControlName="password"
            [feedback]="true"
            class="w-full"
            [inputStyle]="{ width: '100%' }"
          ></p-password>
          <label for="password">Password</label>
        </p-floatlabel>
      </div>

      <div class="block font-bold p-1 border-round mb-3 w-full">
        <p-floatlabel variant="on" class="w-full">
          <p-password
            formControlName="confirmPassword"
            [feedback]="false"
            class="w-full"
            [inputStyle]="{ width: '100%' }"
          ></p-password>
          <label for="confirmPassword">Confirm Password</label>
        </p-floatlabel>
      </div>

      <div class="block font-bold p-1 border-round mb-3 w-full">
        <button
          pButton
          type="submit"
          label="Sign Up"
          class="p-button-rounded p-button-success w-full"
        ></button>
      </div>
    </div>
  </form>

  <p class="switch">
    Already have an account?
    <a routerLink="/login">Log In</a>
  </p>
</div>
Adding Routing Transitions and Animations
Modern apps feel alive when transitions are smooth. You can add basic route animations.
.register-animation {
  opacity: 1;

  @starting-style{
    opacity: 0;
  }

  transition: opacity 1500ms ease-in-out, max-height 500ms ease-in-out;
}
Then, wrap your router outlet with the animation trigger.
<div class="register-animation">
  <router-outlet></router-outlet>
</div>
Launch an application
ng serve
http://localhost:4200/login
Creating a Shared Authentication Service
Centralize authentication logic for login and signup using a shared service.
import { Injectable } from '@angular/core';
import { HttpClient } from '@angular/common/http';
import { Observable } from 'rxjs';

@Injectable({ providedIn: 'root' })
export class AuthService {
  private baseUrl = 'https://api.example.com/auth';

  constructor(private http: HttpClient) {}

  login(data: any): Observable<any> {
    return this.http.post(`${this.baseUrl}/login`, data);
  }

  register(data: any): Observable<any> {
    return this.http.post(`${this.baseUrl}/register`, data);
  }
}
You can connect these methods in the respective components to send data to your backend API.
Implementing Success Feedback and Navigation
After successful login or signup, redirect users with a success message.
import { Router } from '@angular/router';
import { MessageService } from 'primeng/api';

constructor(private router: Router, private messageService: MessageService) {}

onSubmit() {
  this.submitted = true;
  if (this.loginForm.invalid) return;

  this.authService.login(this.loginForm.value).subscribe({
    next: () => {
      this.messageService.add({ severity: 'success', summary: 'Login successful' });
      this.router.navigate(['/dashboard']);
    },
    error: () => {
      this.messageService.add({ severity: 'error', summary: 'Invalid credentials' });
    }
  });
}
Import the MessagesModule and MessageService in your module to enable notifications.
Enhancing UX with PrimeFlex
PrimeFlex offers utility classes for responsive design. Add it for better layout management.
npm install primeflex
You can then use grid and spacing utilities:
<div class="grid justify-content-center align-items-center h-screen">
  <div class="col-12 md:col-6 lg:col-4">
    <app-login></app-login>
  </div>
</div>
This makes your form responsive across devices.
Note on Angular 20 Animations Deprecation
With Angular 20, the traditional animation system @angular/animations has been deprecated. This change aims to simplify the framework and improve performance by reducing the overhead of runtime animations. Although existing animation APIs still function, developers are encouraged to prepare for the upcoming transition.
The PrimeNG team has acknowledged this deprecation and announced that PrimeNG 21 will include full support for the new Angular animation model. This update will modernize how UI transitions and effects are handled, ensuring smoother performance and better compatibility with future Angular versions.
Until PrimeNG 21 is released, you can continue using the existing BrowserAnimationsModule without breaking changes. However, when upgrading, review your animation imports and adjust them according to the new PrimeNG documentation once Angular 21 compatibility is introduced.
Deploying Your Authentication Module
When the UI looks polished, you can integrate backend APIs, such as Firebase Authentication or your custom Node.js server.
Build your production-ready app:
ng build --configuration production
Host it on a platform like Vercel, Netlify, or Firebase Hosting for quick deployment.
Finally
You’ve now created a modern login and registration page using PrimeNG and Angular 20. With Reactive Forms, p-floatlabel, p-password, and custom error styling, your authentication interface is dynamic and elegant. By implementing routing, feedback, and accessibility, you’ve achieved a professional-grade design that scales beautifully.
This modular approach enables you to extend authentication with features such as password reset, social login, or multi-step onboarding ensuring a seamless user experience for any modern web application.
This article was originally published on Medium.