If you love the Spring Framework, you’ll be excited about Spring AI. It’s a modern extension designed to integrate artificial intelligence models into Java applications. Built by the Spring team, it follows the same familiar patterns you already know.
Spring AI helps developers connect applications to large language models (LLMs) such as Google Gemini, OpenAI GPT, or Azure OpenAI. Instead of building custom connectors, Spring AI provides a consistent way to call models, send prompts, and receive responses.
Why does this matter? Because as applications become more intelligent, developers need reliable frameworks to manage complexity. Spring AI delivers that by combining AI with Spring Boot’s simplicity.
Key Features of Spring AI
Let’s go over what makes Spring AI so useful:
- Model Abstraction: You can switch between AI providers without rewriting your business logic.
- Prompt Templates: Define reusable templates that keep your code organized and flexible.
- Streaming Responses: Handle large AI outputs as they arrive instead of waiting for completion.
- Spring Boot Integration: Works naturally with Spring’s configuration and dependency injection.
- Observability: Supports logging and monitoring so you can track model behavior.
Each feature is designed to save you time and improve consistency. Developers no longer need to fight with raw HTTP calls or scattered API keys. Instead, they configure properties in application.yml and start coding.
How Spring AI Fits into the Spring Ecosystem
Spring AI isn’t a separate island. It integrates seamlessly into the larger Spring ecosystem. If you already use Spring Boot, Spring Web, or Spring Data, adding AI feels natural.
Think about it this way: Spring Boot simplified microservices. Spring Data simplified database access. Now, Spring AI is simplifying artificial intelligence integration.
You can expose an AI-powered service through Spring WebFlux or combine AI with data from Spring Data JPA. With Spring Security, you can also protect your AI endpoints.
This deep integration means you don’t need to learn a completely new framework. Instead, you extend your existing knowledge while unlocking powerful new features.
Why Choose Google Gemini with Spring AI?
Now, you might ask, “Why Google Gemini?” Great question! Google Gemini is one of the most advanced LLMs available today. It supports multimodal inputs, meaning it can handle text, images, and even code snippets.
By using Gemini with Spring AI, you can build applications that generate natural responses, analyze text, or summarize documents. Imagine a chatbot for customer support, a content generator for blogs, or an assistant that helps developers write code.
Gemini brings cutting-edge AI. Spring AI makes it easy to integrate. Together, they form a strong foundation for intelligent applications.
Setting Up Your First Spring AI Project
Let’s roll up our sleeves and create a project together. We’ll use Spring Boot with Google Gemini.
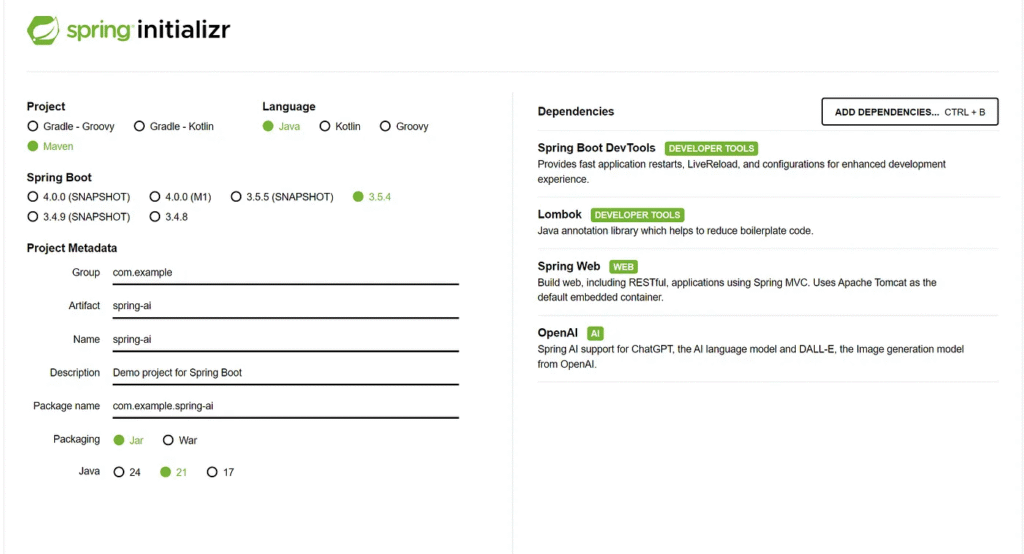
Step 1: Create a New Spring Boot Project
Visit start.spring.io. Choose Maven Project, Java, and the latest Spring Boot version. Add the following dependencies:
- Spring Web
- Spring AI
Then click Generate and download the project.
Step 2: Add Dependencies for Gemini
Open your pom.xml and add the Gemini starter:
<dependency>
  <groupId>org.springframework.ai</groupId>
  <artifactId>spring-ai-starter-model-openai</artifactId>
</dependency>
This brings Gemini support into your project.
https://start.spring.io/index.html
Step 3: Configure API Keys
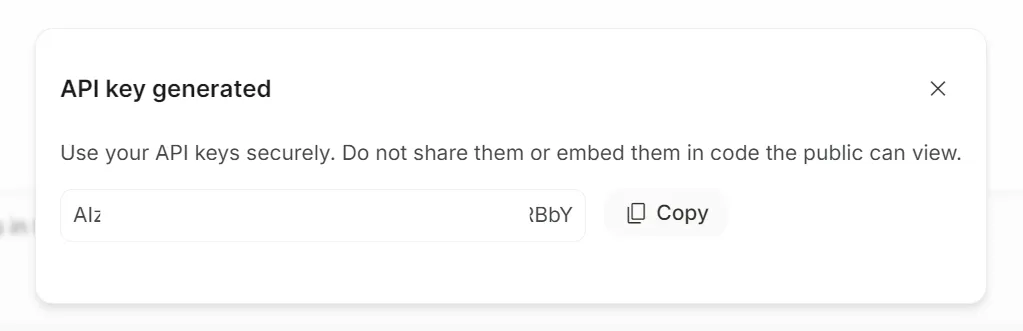
Generate API Key
Google AI Studio API Key: This is where you can generate and manage your API keys to access Google’s Gemini large language models (and other generative AI models) for free (within certain usage limits) and directly, outside of the Google Cloud Platform (GCP) Vertex AI environment.
https://aistudio.google.com/app/apikey

Create API Key
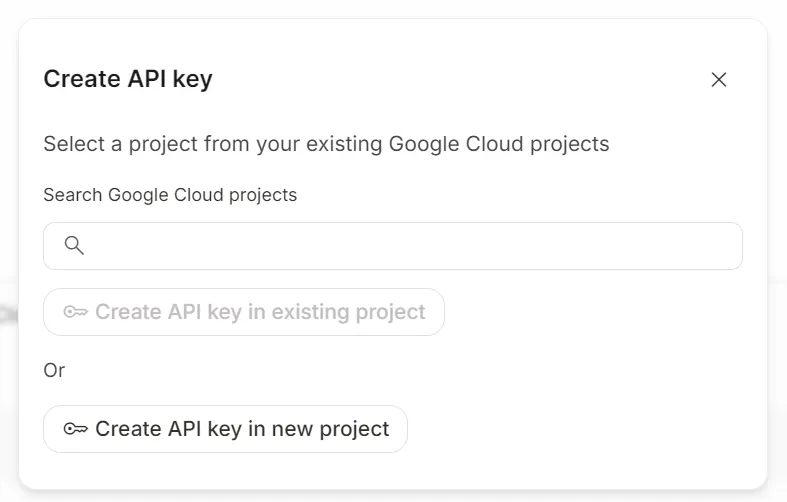
Create API Key in new project
In application.yml, configure Gemini’s API key:
server:
  port: 8080
spring:
  application:
    name: spring-ai
  ai:
    openai:
      api-key: "you-api-key"
      base-url: https://generativelanguage.googleapis.com/v1beta/openai
      chat:
        completions-path: /chat/completions
        options:
          model: gemini-2.0-flash-exp
Make sure to store the key securely, not in version control.
Step 4: Create a Service Class
Now let’s create a service that calls Gemini.
@Service
@Slf4j
public class GeminiService {

    private final ChatClient chatClient;

    public GeminiService(ChatClient.Builder chatClientBuilder) {
        this.chatClient = chatClientBuilder.build();
    }

    public String getSimpleResponse(String userPrompt) {
        return chatClient.prompt()
                .user(userPrompt)
                .call()
                .content();
    }
}
This class sends a prompt to Gemini and returns the response.
Step 5: Build a REST Controller
Create a simple controller:
@RestController
@RequestMapping("/ai")
public class GeminiController {
    private final GeminiService geminiService;

    public GeminiController(GeminiService geminiService) {
        this.geminiService = geminiService;
    }

    @GetMapping("/ask")
    public String ask(@RequestParam String question) {
        return geminiService.askGemini(question);
    }
}
Now your application exposes an endpoint at /ai/ask?question=Hello.
Step 6: Run and Test
Start the application with IntelliJ IDEA
Open your browser and visit:
http://localhost:8080/ai/ask?question=Tell me a joke
You should see Gemini’s response returned directly.

Expanding Your Project
Once you’ve got the basics running, you can expand further:
- Add Prompt Templates for structured conversations.
public String generateContentAboutTopic(String topic) {
    String promptText = """
            Generate a short, engaging article about the following topic: {topic}.
            Keep it concise and informative, around 3-4 paragraphs.
            """;
    PromptTemplate promptTemplate = new PromptTemplate(promptText);
    Prompt prompt = promptTemplate.create(Map.of("topic", topic));

    return chatClient.prompt(prompt).call().content();
}- Use Spring Data to store user prompts and responses.
- Stream Gemini’s responses for better interactivity.
- Secure endpoints with Spring Security.
By layering these features, you’ll transform a simple demo into a production-ready AI-powered application.
Standard API rate limits for Gemini
As your API usage and spending increase, you’ll have an option to upgrade to a higher tier with increased rate limits.
https://ai.google.dev/gemini-api/docs/rate-limits
Finally
Spring AI lowers the barrier to AI adoption for Java developers. Instead of worrying about complex APIs, you focus on your business logic. By combining Google Gemini’s intelligence with Spring Boot’s power, you can build more innovative applications faster.
Now it’s your turn! Grab a coffee, create a Spring AI project, and test Gemini today. I promise you’ll be amazed at how natural it feels.
This article was originally published on Medium.