Building modern web apps requires multilingual support. A single-language interface limits accessibility and user engagement. By integrating HeroUI with Next.js i18n, you can create seamless, multilingual user experiences. In this tutorial, we’ll walk through adding next-intl to a HeroUI + Next.js project using TypeScript.
1. Why Multi-language Support Matters
Supporting multiple languages improves usability and user satisfaction. People understand your app better when they read content in their native language. Localization also helps search engines rank your site in different regions.
Next.js handles internationalization effectively, and HeroUI provides modern, responsive UI components. Using next-intl simplifies translation management and reduces boilerplate code.
2. Setting Up the Project

3. Using next-intl
Directory structure
next-app-intl/
├── app/
│   ├── [locale]/
│   │   ├── about/
│   │   │   └── page.tsx
│   │   ├── layout.tsx
│   │   └── page.tsx
│   ├── globals.css
│   └── layout.tsx
├── i18n/
│   ├── request.ts
│   └── routing.ts
├── messages/
│   ├── en.json
│   ├── th.json
└── middleware.ts
Step 1 — Install next-intl
npm install next-intl
Step 2 — Create Translation Files
/messages
   ├── en.json
   └── th.json
messages/en.json
{
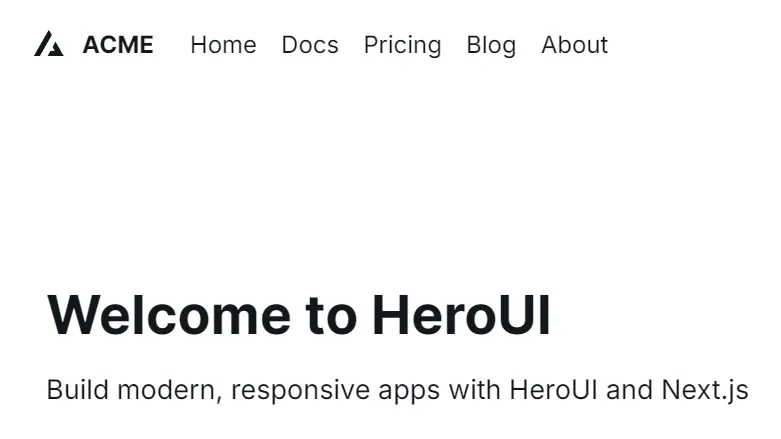
"title": "Welcome to HeroUI",
"description": "Build modern, responsive apps with HeroUI and Next.js",
"language":"English",
"change_language":"Change language"
}messages/th.json
{
  "title": "ยินดีต้อนรับสู่ HeroUI",
  "description": "สร้างแอปที่ทันสมัยและตอบสนองด้วย HeroUI และ Next.js",
  "language":"ไทย",
  "change_language":"เปลี่ยนภาษา"
}
Step 3 — Configure Middleware
Add middleware.ts:
import createMiddleware from 'next-intl/middleware';
import {routing} from './i18n/routing';

const middleware = createMiddleware(routing);

export default function(request: any) {
  return middleware(request);
}

export const config = {
     matcher: ['/((?!api|_next|.*\\..*).*)']
};
Step 4 — Create Layout
Modify app/[locale]/layout.tsx:
import { NextIntlClientProvider } from "next-intl";
import { getMessages } from "next-intl/server";
import { notFound } from "next/navigation";
import { routing } from "@/i18n/routing";

export default async function LocaleLayout({
  children,
  params,
}: {
  children: React.ReactNode;
  params: Promise<{ locale: string }>;
}) {
  const { locale } = await params;
  if (!routing.locales.includes(locale as any)) {
    notFound();
  }

  const messages = await getMessages();

  return (
    <>
      <NextIntlClientProvider messages={messages}>
        {children}
      </NextIntlClientProvider>
    </>
  );
}
Step 5 — Use Translations in HeroUI Components
app/[locale]/about/page.tsx:
import {useTranslations} from 'next-intl';

export default function AboutPage() {
  // Specify the namespace 'HomePage' to load translations from HomePage.json
  const t =  useTranslations();

  return (
    <div className="container mx-auto px-4 py-8">
      <header className="flex justify-between items-center mb-8">
        <nav className="flex gap-4">
        </nav>
      </header>

      <main>
        <h1 className="text-4xl font-bold mb-4">{t('title')}</h1>
        <p className="text-lg mb-6">{t('description')}</p>
      </main>
    </div>
  );
}
Specify the namespace
Translations from your en.json file in a Next.js component using next-intl, you use the useTranslations hook and provide the namespace as an argument. This tells the hook to only load the messages from that specific part of your JSON file, keeping your components lightweight and organized.
// messages/en.json
{
  "HomePage": {
    "title": "Welcome to our home page!",
    "description": "Find everything you need here."
  },
  "AboutPage": {
    "title": "About Us",
    "mission": "Our mission is to..."
  }
}
// app/[locale]/about/page.tsx:
// Specify the namespace 'HomePage'
const t = useTranslations('HomePage');Step 6— i18n
./i18n/about/request.ts:
import { getRequestConfig } from 'next-intl/server';
import { routing } from './routing';

export default getRequestConfig(async ({ requestLocale }) => {
  let locale = await requestLocale;

  // Ensure that a valid locale is used
  if (!locale || !routing.locales.includes(locale as any)) {
    locale = routing.defaultLocale;
  }

  return {
    locale,
    messages: (await import(`../messages/${locale}.json`)).default
  };
});
./i18n/about/routing.ts:
import {defineRouting} from 'next-intl/routing';

export const routing = defineRouting({
  locales: ['en', 'th'],

  defaultLocale: 'en',

  pathnames: {
    '/': '/',
    '/about': {
      en: '/about',
      th: '/about'
    }
  }
});

export type Pathnames = keyof typeof routing.pathnames;
export type Locale = (typeof routing.locales)[number];
Using the Pathnames
You can use the pathnames in your navigation and link components. This makes your code locale-agnostic and simplifies link management. Instead of hardcoding URLs, you use the canonical path name, and next-intl handles the localization for you.
pathnames: {
  '/': '/',
  '/about': {
    en: '/about',
    th: '/เกี่ยวกับ'
  }
}
Step 7— Update Next.js config
next.config.js
import createNextIntlPlugin from 'next-intl/plugin';
const withNextIntl = createNextIntlPlugin('./i18n/request.ts');
const nextConfig = {};
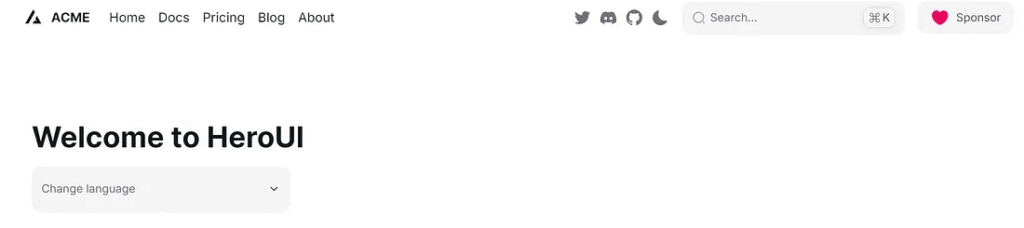
export default withNextIntl(nextConfig);Step 8— Add Language Switcher Component
./app/[locale]/page.tsx
"use client";
import {useTranslations} from 'next-intl';
import LanguageSwitcher from '@/components/LanguageSwitcher';

export default function HomePage() {
  const t = useTranslations();

  return (
    <div className="container mx-auto px-4 py-8">
        <h1 className="text-4xl font-bold mb-4">{t('title')}</h1>
        <LanguageSwitcher />
    </div>
  );
}
./component/LanguageSwitcher.tsx
"use client";
import { useLocale, useTranslations } from "next-intl";
import { usePathname, useRouter } from "next/navigation";
import {Select, SelectItem} from "@heroui/react";
export default function LanguageSwitcher() {
const t = useTranslations();
const locale = useLocale();
const router = useRouter();
const pathname = usePathname();
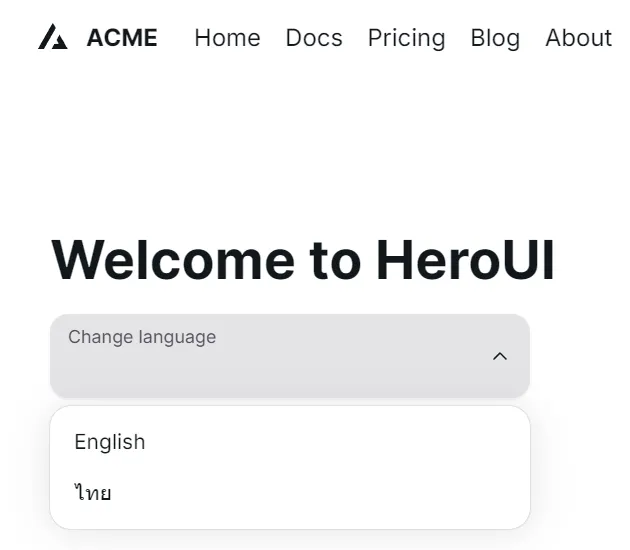
const languages = [
{ code: "en", name: "English" },
{ code: "th", name: "ไทย" },
];
const handleSelectionChange = (e:any) => {
const newPathname = pathname.replace(`/${locale}`, `/${e.target.value}`);
router.push(newPathname);
router.refresh();
};
return (
<div className="relative">
<label htmlFor="language-select" className="sr-only">
{t("language")}
</label>
<Select className="max-w-xs" label={t("change_language")} onChange={handleSelectionChange}>
{languages.map((language) => (
<SelectItem key={language.code}>{language.name}</SelectItem>
))}
</Select>
</div>
);
}Test Application
npm run dev
http://localhost:3000/en

http://localhost:3000/th/about

http://localhost:3000/en/about
6. Wrapping Up
By integrating HeroUI, Next.js, and next-intl, you can build beautiful multilingual apps.
You learned how to:
- Configure HeroUI with Next.js
- Add translations using next-intl
- Localize HeroUI components
- Switch languages seamlessly
Final Thoughts on Using next-intl
Integrating next-intl with HeroUI and Next.js offers a powerful and flexible approach to building multilingual applications. It handles translations, routing, and dynamic content efficiently while keeping your codebase clean.
With next-intl, you can:
- Manage translations easily with JSON files
- Leverage automatic locale detection through middleware
- Provide dynamic, server-rendered translations
- Scale your app to support multiple regions seamlessly
Unlike next-translate, which focuses on simplicity, next-intl is better suited for larger, content-rich applications where SEO and dynamic translations matter. It gives you more control over locale-specific data, making it an excellent choice for production-grade projects.
By combining HeroUI’s modern UI components with next-intl’s powerful i18n capabilities, you can create beautiful, multilingual, and highly optimized web applications with minimal effort.
If you aim to scale globally, next-intl provides a solid foundation for localization and growth.
This article was originally published on Medium.